Completion Time: 30min
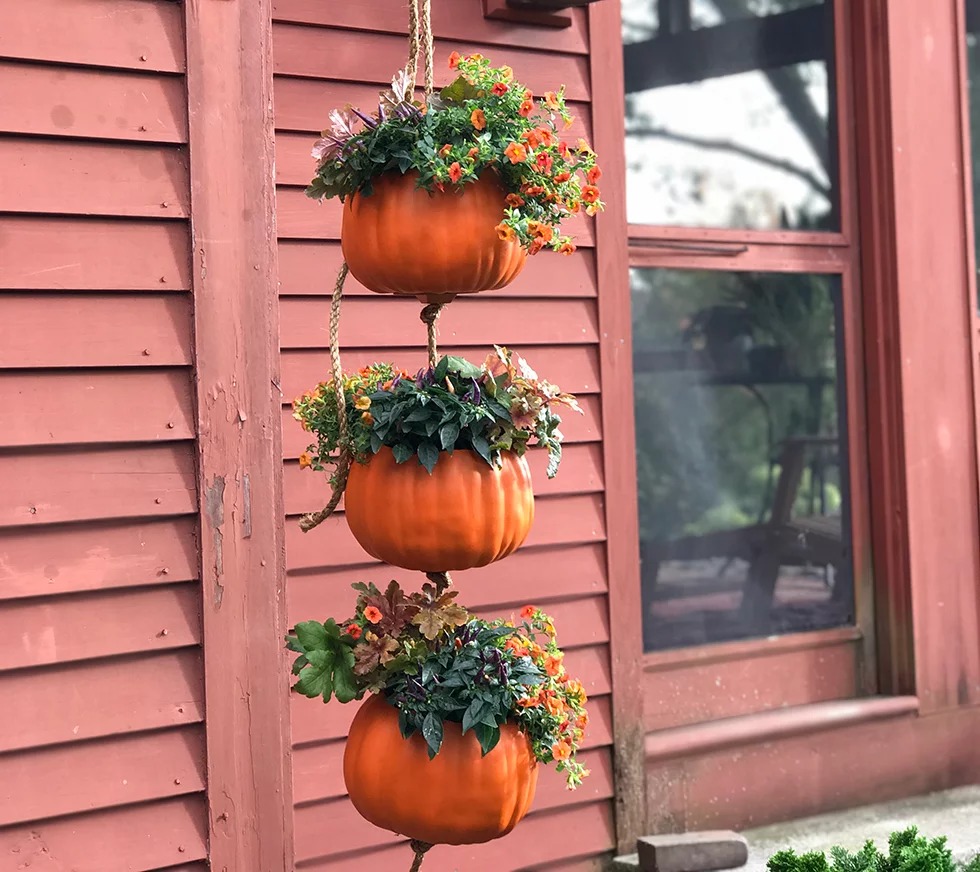
We found some cool carvable craft pumpkins while looking around for Fall decor and thought they’d make a great rustic Fall hanging planter. With a few pieces of hardware and some rope, this planter came together in under half an hour! Watch the how-to video, and find a detailed supply list and written instructions below.
Scroll down for a supply list and complete written instructions.
![]()


1. Three Carvable Faux Pumpkins (We found these at Joann. They are hollow inside.)
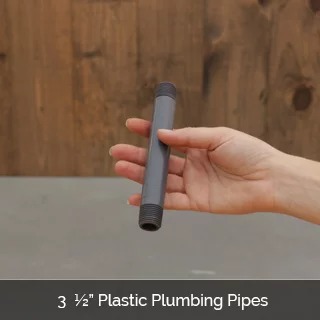
2. Three 1/2″ Plastic Plumbing Pipes (The technical plumbing term for these is “nipples.” We’re not making this up. Make sure they’re threaded at the ends.)
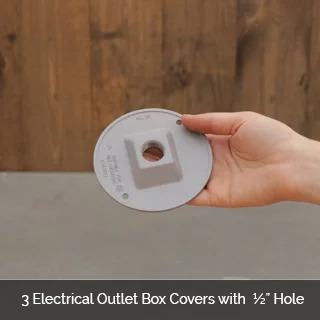
3. Three Electrical Outlet Box Covers with 1/2″ Hole (Make sure that your nipples screw into the threading in these box covers. You’ll be able to find both the nipples and the box covers at a hardware store like Home Depot, Ace or True Value)
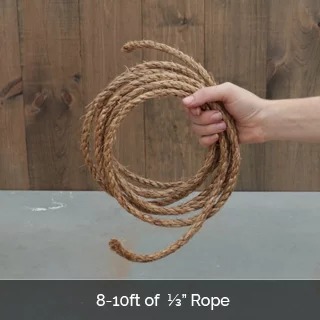
4. 8-10ft of 1/3″ Rope (Make sure that your rope fits through the holes in the box covers and the nipples)
5. Orange Spray Paint (Try to match the color of the craft pumpkins as closely as possible)
6. Box Cutter
![]()
1. Cut the tops off the craft pumpkins
Make sure you have a fresh box cutter blade and cut the tops off of all three craft pumpkins. Imagine these pumpkins as planting pots. The hole you cut should be large enough to make each one easily plantable.
2. Cut 1/2″ holes in the bottoms of the craft pumpkins.
These holes should be centered, and should be just the right size so that you can screw the plumbing pipes into them securely.
3. Spray paint the electrical outlet box covers orange
These pieces will be anchoring the bottoms of your pumpkins, so the whole planter will look much nicer if they match the pumpkins in color. Allow the covers to dry while you proceed to Step 4.
4. Screw the plumbing nipples into the bottoms of all three pumpkins.
The pipe should be screwed in from the inside of the pumpkin, so that the threading on the end of the pipe sticks out of the pumpkin on the bottom. Enough threading needs to be accessible to screw the outlet box cover onto the pipe.
5. Screw the outlet box covers onto the exposed pipe threading at the bottom of your three pumpkins.
When screwed in, each pumpkin should be snugly held on the pipe/box cover assembly.
6. Thread the pumpkins onto the rope
Make a knot about a foot from the end of your rope, then thread the full length of the rope through the bottom hole of the first pumpkin. Holding up the rope, the pumpkin should sit on top of the knot without too much wobbling. Moving about 8 inches up from the rim of the first pumpkin, make another knot and repeat the process until you have all thee pumpkins on the rope. Now you’re ready to hang it and plant!
7. Hang it and plant!
Plant up your pumpkins with some cold-tolerant fall plants. We planted our pumpkins with Superbells® Dreamsicle Calibrachoa, Sangria Ornamental Pepper, and Fun and Games® ‘Hopscotch’ Heucherella.