Imagine. After months of searching, you’re buying your first house. It’s a charming 100-year-old home in an idyllic lakeshore town. Sure, the outdoor space needs a little TLC, but inside it’s perfect. (Is that plywood on the porch ceiling? Oh never mind. Look at the kitchen sink!) A few hundred signatures later, you and your soon-to-be-spouse move in, patting yourselves on the back for being so good at adulthood.
A few months and then years pass. You make the little adjustments needed to create a home – a coat of paint, pictures on the walls, a new rug tucked under the hand-me-down couch.
Another year goes by. You’re starting a family! Congratulations! You’re glowing! And nesting! Has the front yard always been that bad? Oh my gosh, when did the porch become a death trap?
I was just over eight months pregnant when it hit me. We were yard blind. While my husband, Mike, and I had worked on the backyard, garden beds increasing each year, the front yard was downright ugly.
Thirty-year-old yews wrapped the dark porch, its weight resting on a fraction of an inch of cinder block. White paint tried to hide the plywood ceiling, which maybe complimented the MacGyvered pipe stair rail. The floor was rotting and sagging. The deck skirting had fallen, its little lattice diamonds overtaken by weak hostas and ever-spreading lily of the valley. It needed a complete overhaul.
We were soon sleep deprived new parents, planning a renovation between our daughter’s naps. Mike and I plotted and pinned {https://www.pinterest.com/shannonspringer/front-garden/} through summer, interviewed contractors through fall and winter, and one sunny spring day, ventured out with hedge clippers to tackle those yews and kick off what was a lesson filled experience.
Five Lessons from a Garden Renovation
ONE: However long you think a project will take, double it. If there is a tiny human in your house,
quadruple it.
When we expressed to the contractor that our wish was to have the porch completed in time for our daughter’s first birthday party in mid-April, he was confident, assuring us it would only take a day for demo (true) and about two weeks to build our new front porch (complete and utter rubbish). Between frequent spring rainstorms and my complicated dream Chippendale railings, it was mid-June before they wrapped up the building portion of the job.
Phase two consisted of finishing work, which Mike and I did ourselves to keep costs down. I also fancy myself pretty talented with a paintbrush and wasn’t about to let a stranger have all the fun. I should have. Scraping, painting, and staining in two hour increments while your baby naps is not an efficient way to work. We tucked away our brushes and rags in September.
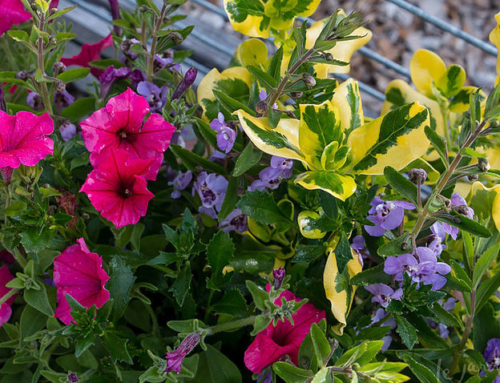
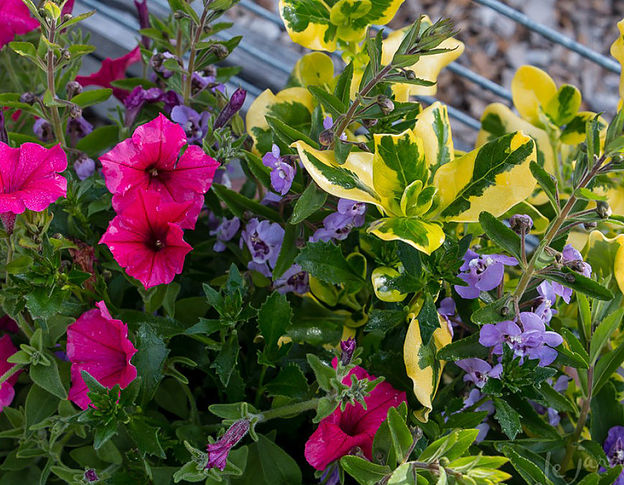
TWO: Use annuals for instant life and color.
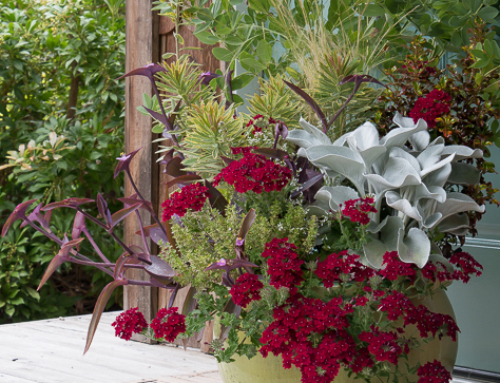
Construction sites are barren, dirty, and not exactly aesthetically pleasing, so when two big boxes of annuals arrived on my doorstep in early June, I was ecstatic and immediately pulled on my gardening gloves. Containers and buckets of tools mixed to line the stairs and frame the door. The pots were 100% in the way and terribly neglected with more paint splatter than water.
But they were glorious.
Sure, the tall tufts of Prince Tut™ papyrus were dappled with white primer, and my overflowing Supertunia® Bordeaux™ plantings were dragged onto the driveway almost daily, but they were what my color-hungry soul needed and made our dustbowl feel like home again.
THREE: Start with structure.
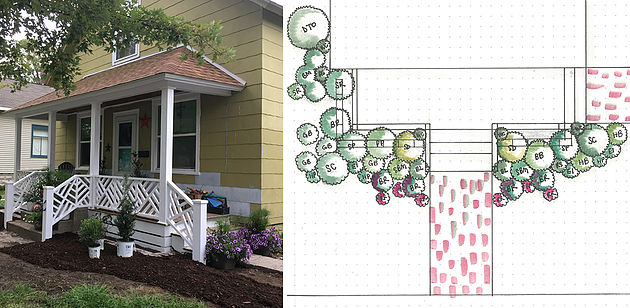
A new garden space is intimidating, and even though I had a clear vision and color palette in mind (and on my Pinterest boards), I was lost and overwhelmed.
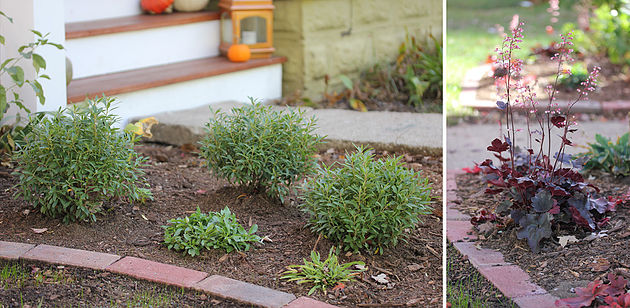
The breakthrough moment was when I brought home a load of evergreens. Two narrow Sky Pointer® Japanese hollies anchored the space at either corner of the porch, and several rounded Gem Box® inkberry hollies, a great boxwood alternative, were grouped in trios that were simultaneously whimsical and a touch formal. Dividing the space with these strong forms created manageable pockets for other shrubs and perennials. Placement came easily afterward.
FOUR: Start small.
It would be crazy talk to try to do the entire space at once. We started with the beds closest to the remodeled porch, but our garden certainly won’t stop there.
There’ll be beds along the front sidewalk, beds on the property line (with the neighbors’ blessings), red brick walkways, and window boxes. I have ideas! But we would be exhausted, broke, and probably really cranky if we tried to tackle it all at once. Pick one spot, do it to the best of your abilities, and move on when you’re ready.
FIVE: Be patient and realistic.
Perennials and shrubs need time. The phrase “sleep, creep, leap” has been repeated among gardeners for centuries for a reason. Yet it’s so easy to be disappointed with the results at the beginning because your small, freshly planted landscape looks, well, small and freshly planted. I was on the verge of scrapping this blog at least a dozen times because it didn’t look good enough to share. But it is and it will only get better as things grow and the design is refined. All great spaces have to start somewhere.
This is just the beginning of our garden, and I’ll continue to share the space as it changes and grows.


